

Today I am going to show you how to apply bias binding which I LOVE. It is great for making your clothes look super professional with a good couture finish. It’s not the easiest thing to do and it can look pretty messy if you don’t follow the steps so I am going to share a few secrets with you to have your garment looking beautiful.
When I worked for high end designers, they were sooo picky about the bias binding. Whilst it often gave me a headache, I also became quite an expert on it.
In the nineties I worked for a wonderful designer in Bath, England. I produced an entire collection of wonderful clothes twice a year working with slippery velvet and fine, sheer silks. We rarely serged anything and bound all seams with bias binding or used french seams. Needless to say it wasn’t always easy and my particular pet hate were binding sheer organza coats!
Once you had to add bias binding to an orange organza coat (of which I made one too many!) you will understand that bias binding is a complex issue. I couldn’t find the exact picture of the coat in question, but have a look at this recent design and you will see examples from Carole Wallers’ most recent collection!
The reason I mention orange organza in particular is because orange organza is soft whereas black organza is firmer. It is just how the fabric dye works. The lesson I learnt from this? When you are making your own bias binding you need to ensure an even firmness of the bias tape and to achieve this I recommend investing in spray starch (it’s going to be your new best friend) which is especially important when you are using a bias binding attachment on your sewing machine. If it’s too soft it will twist and be an absolute nightmare to work with…save yourself the headache!
So, I’m going to show you two professional methods with self-cut bias tape.
“Why these methods and not the pre-ironed bias tape you can readily buy everywhere, Marina?” You may ask? Because this is so much nicer! It also gives you a much more professional look and lastly you can make any lightweight fabric into a beautiful finish on your garments.
Here we go, let’s learn how to apply bias binding (the couture way)!
First of all, grab that starch and generously apply to the fabric you wish to turn into bias binding. The beauty of starch is that it washes and wears out – by the time you have finished handling the fabric or when you wash it the starch will magically disappear and the perfectly applied bias binding will make people admire your skills.
“How on earth did she get it so straight and even?” they will wonder.


How wide should you make the bias binding?
The short answer is that if you have lots of bias binding to do keep it wide (about 4cm) as it will be easier to work with, and if you have less to do then you can make it less wide.
*The most important thing about bias binding…. is that it must be cut across the grain.* This means that you need to cut it at a 45 degree angle, as this gives you the right amount of stretch (making bias binding perfect for curves!)

1. The Couture Method (bias tape is visible)
The couture method has two options and the first one has the bias visible. It actually will turn out super professional and its also less likely to look home made, if correctly executed.
Here we need to cut the bias tape a little wider, as we are first folding the bias lengthways in half. This will result in multiple layers of fabric so it is important to use light-weight materials for it. Cut the wider strips, say at least 4.5 cm ( 1.8 inches) wide.

Grab your ruler and mark the bias tape out. Straighten up the rough edge first.

Mark the bias tape out. Cut the strips and you are almost there.


Iron the bias lengthways in half.


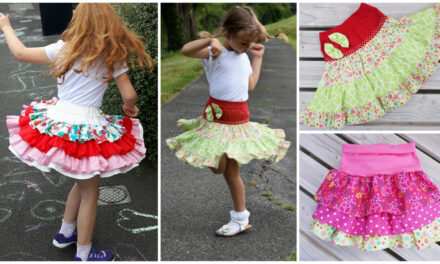
To show how it all works I am sharing with you how to bind a pocket on the festive version of my half apron which you can find here.


The bias is placed on the underside of the pocket and sewn on with a 1 cm seam allowance. The key here is to keep the bias tape straight as you feed it into the presser foot while you move the pocket edge which lies beneath.

Now we are going to cut back that seam allowance.

Now we are doing some understitching (in this case we are sewing the binding to the apron). The reason for understitching is that it stabilises the fabric, gives you a perfect edge and makes your sewing much easier to work with.

This method is used in the industry really frequently, as it means that the production worker doesn’t have to get up to iron the garment! It’s one of my favourite tricks as it’s much quicker than getting up to iron after every step.
Onwards my dears…. next we are rolling that gorgeous bias to the top side of the edge.

Pin the bias to the edge, keeping the distance even. If you work accurately it is a breeze (take your time on getting this bit right, I promise it’ll make all the difference to the finished product).

Alternatively, if you’re feeling confident and are a more experienced sewer, there is no need to pin. I personally love just going at it and not moving from my sewing machine. Bam!

Now we topstitch very neatly and close to the edge. You only have to worry about that and it whether it catches underneath! Lovely!
And that is it friends, a beautiful firm edge which will be much less likely to stretch!
2. Couture Binding (not visible)

This is the most common used method in industrial manufacturing. You see it absolutely everywhere! The key is to make sure the bias ends up nice and slim!The bias tape should be 3,5 cm wide for this method. Some people prefer the 1 cm seam allowance and then trim. Professionals usually just use less seam allowance and a slimmer bias tape. That is up to you.
Beginner sewers should use the 1 cm seam allowance and then trim back sharpish!

So this is how it is done. We sew the bias tape to the outside of the garment. Then we cut the seam allowance back.

Now we under-stitch the seam. This means we are sewing the bias to the seam allowance. It results in a perfect finish. A little lip is created which prevents any of the bias from showing.

Roll the bias to the inside and topstitch at an equal distance to the edge. The result is a perfect t-shirt edge which will not stretch – hurrah!

And that is all for today folks! I really hope this helps you understand a little bit more about self-cut bias tape. Let us know in the comments how you found it….!
Don’t forget we also have this tutorial as a video in our academy as part of the sewing course. It’s free, so pop over and enjoy!


Recent Comments